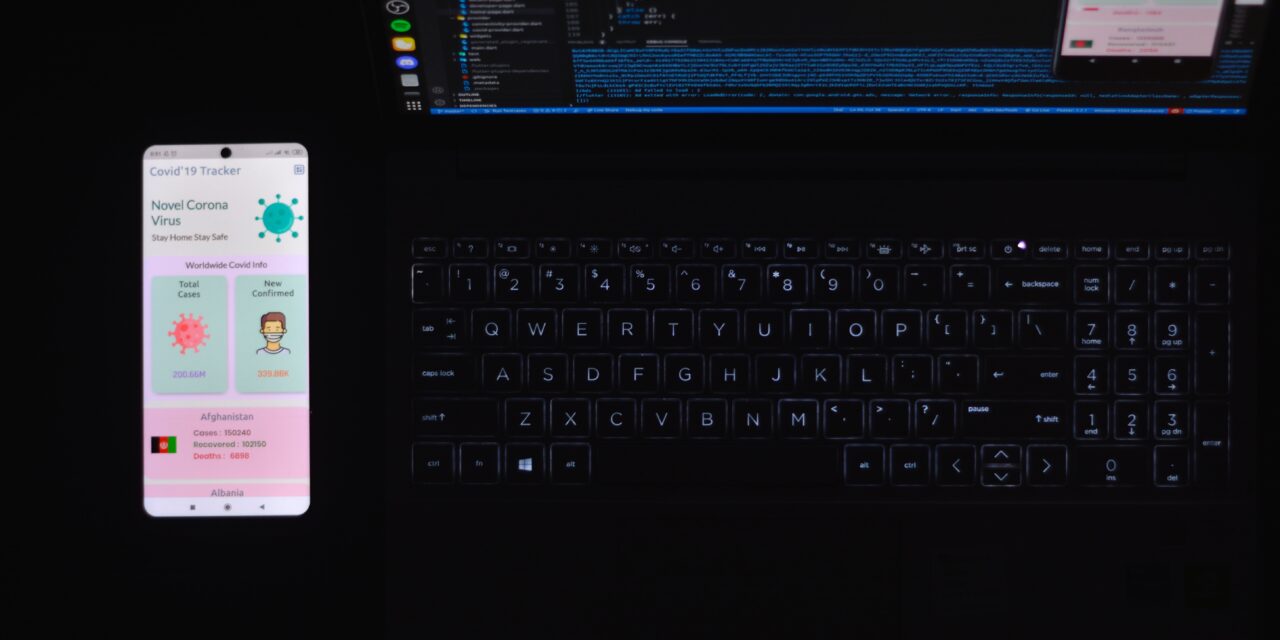
Flutter, developed by Google, is a powerful open-source framework for building cross-platform applications. To harness the full potential of Flutter, you need to set up a development environment. In this comprehensive guide, we will walk you through the step-by-step process of installing Flutter on Android Studio for macOS. So, let’s get started and unlock the world of Flutter app development on your Mac.
-
Install Android Studio
Before installing Flutter, ensure that you have Android Studio, the official IDE for Android development, installed on your macOS. Here’s how to install Android Studio:
Step 1: Download Android Studio:
- Visit the official Android Studio website at https://developer.android.com/studio.
- Click on the “Download Android Studio” button.
- Choose the macOS version and download the .dmg file.
Step 2: Install Android Studio:
- Locate the downloaded .dmg file and double-click to open it.
- Drag and drop the Android Studio icon into the Applications folder.
- Open Android Studio from the Applications folder.
- Follow the on-screen instructions to complete the installation process.
-
Set up Flutter SDK
After installing Android Studio, the next step is to set up the Flutter SDK. Follow these steps to install the Flutter SDK on macOS:
Step 1: Download the Flutter SDK:
- Visit the Flutter website at https://flutter.dev/docs/get-started/install/macos.
- Click on the “Download Flutter SDK” button to download the latest stable release.
- Extract the downloaded file to a location of your choice.
Step 2: Add Flutter to the macOS PATH:
- Open the Terminal application on your Mac.
- Run the following command to open your shell profile file (e.g., .bash_profile, .zshrc or .zprofile):
open -e .bash_profile
Note: Replace .bash_profile with your respective shell profile file. If you get an error “The file /Users/-/.bash_profile does not exist” you can check solutions here https://stackoverflow.com/questions/47272164/no-bash-profile-on-my-mac
Step 3: Add the Flutter SDK path to the PATH variable:
- Add the following line to your shell profile file:
export PATH="$PATH:[PATH_TO_FLUTTER_DIRECTORY]/flutter/bin"
Note: Replace [PATH_TO_FLUTTER_DIRECTORY] with the actual path where you extracted the Flutter SDK.
Step 4: Apply the changes:
- Save the changes to your shell profile file.
- Close and reopen the Terminal application, or run the following command to apply the changes:
source [PATH_TO_PROFILE_FILE]
Note: Replace [PATH_TO_PROFILE_FILE] with the actual path to your shell profile file.
-
Set up an Android device or emulator
To test and run Flutter applications, you need an Android device or an emulator. Here’s how to set up an Android device or emulator in Android Studio:
Step 1: Open Android Studio:
- Open Android Studio on your macOS.
Step 2: Open AVD Manager:
- Click on “Configure” on the welcome screen.
- Select “AVD Manager” from the drop-down menu.
Step 3: Create a virtual device:
- In the AVD Manager window, click on the “Create Virtual Device” button.
- Choose a device definition and click “Next.”
- Select a system image (e.g., Android Q) and click “Next.”
- Customize any additional settings if desired and click “Finish.”
-
Install Flutter and Dart plugins in Android Studio
To enable Flutter development in Android Studio, you need to install the Flutter and Dart plugins. Follow these steps:
Step 1: Open Android Studio Preferences:
- Open Android Studio.
- Click on “Android Studio” in the menu bar.
- Select “Preferences” from the drop-down menu.
Step 2: Install the Flutter plugin:
- In the Preferences window, navigate to “Plugins” on the left sidebar.
- Click on “Marketplace” at the top.
- Search for “Flutter” in the search bar.
- Click on the “Flutter” plugin from the search results.
- Click on the “Install” button and follow the instructions to complete the installation.
Step 3: Install Dart plugin:
- In the Preferences window, go to “Plugins” again.
- Click on “Marketplace” at the top.
- Search for “Dart” in the search bar.
- Click on the “Dart” plugin from the search results.
- Click on the “Install” button and follow the instructions to complete the installation.
-
Verify the Flutter installation
To ensure that Flutter is installed correctly, run a few verification commands in the Terminal:
Step 1: Open the Terminal application.
Step 2: Run the following command to verify the Flutter installation:
flutter doctor
Step 3: Review the output and ensure that there are no issues or errors reported.
- If prompted, provide any missing dependencies or resolve any issues according to the instructions provided.
-
Create a new Flutter project
Now that Flutter is successfully installed, let’s create a new Flutter project to ensure everything is working correctly:
Step 1: Open Android Studio.
Step 2: Click on “Start a new Flutter project” on the welcome screen, or go to “File” > “New” > “New Flutter Project.”
Step 3: Select the project type (e.g., Flutter Application) and click “Next.”
Step 4: Enter the project name, choose the location, and click “Finish.”
-
Run your Flutter app
With the Flutter project set up, it’s time to run your app on the Android device or emulator:
Step 1: Ensure that your Android device is connected to your Mac, or start the Android emulator.
Step 2: Open the main.dart file of your Flutter project.
Step 3: Click on the green “Run” button in the toolbar, or go to “Run” > “Run ‘main.dart'”.
Step 4: Select the target device (your connected Android device or emulator) and click “OK.”
Step 5: Wait for the app to build and launch on the selected device.
Conclusion
Congratulations! You have successfully installed Flutter on Android Studio for macOS. You are now ready to embark on your Flutter app development journey. Remember to keep your Flutter SDK and Android Studio up to date for the best development experience. Explore the Flutter documentation and community resources to learn more about building amazing cross-platform applications with Flutter. Happy coding!


